Business managers have plenty on their plates. For one, they have to balance between:
- Deadlines,
- Budgets,
- Goals, and more.
And if that wasn’t enough, business managers also have to keep track of the productivity and attendance of their employees.
But is it even possible to do so many things at once?
Well, yes — a dedicated clock-in clock-out system can help run things smoothly.
Let’s see how it works in practice.
What are the options for clocking in and out at work?
With hundreds of attendance-tracking apps on the market, selecting one that fits your needs can be tricky.
Yet, the time tracking tool Clockify can easily conform to many work situations since it lets you choose between 4 handy options to track attendance:
- Kiosk,
- Timer,
- Timesheet, and
- Auto tracker.
Let’s see what each clock-in clock-out option has in store for you.
Option 1: Kiosk
For illustration, a time clock kiosk is a digital place where employees can clock in and clock out with a couple of clicks.
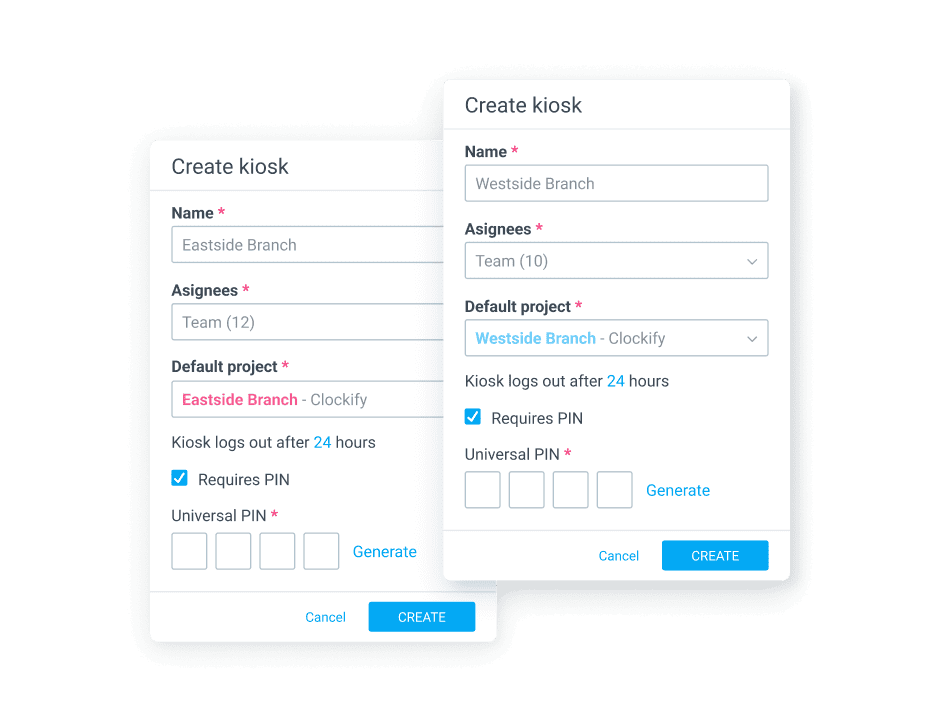
How to set up a time clock kiosk for admins?
As an admin, use a tablet or phone — and follow the instructions below:
- Create a free Clockify account,
- Enable Kiosk mode in Settings,
- Add employees,
- Create a kiosk and select who can use it,
- Place any device (like a tablet) at the employee entrance, and
- Launch the kiosk by opening a link to it in a browser.
How do employees use the time clock kiosk?
As an employee, follow these 4 simple steps to use the time clock kiosk:
- Select your profile,
- Enter your PIN code,
- Choose “Clock in” or “Start break,” and
- Tap “Clock out” or “Finish break” when done with your work or breaks.
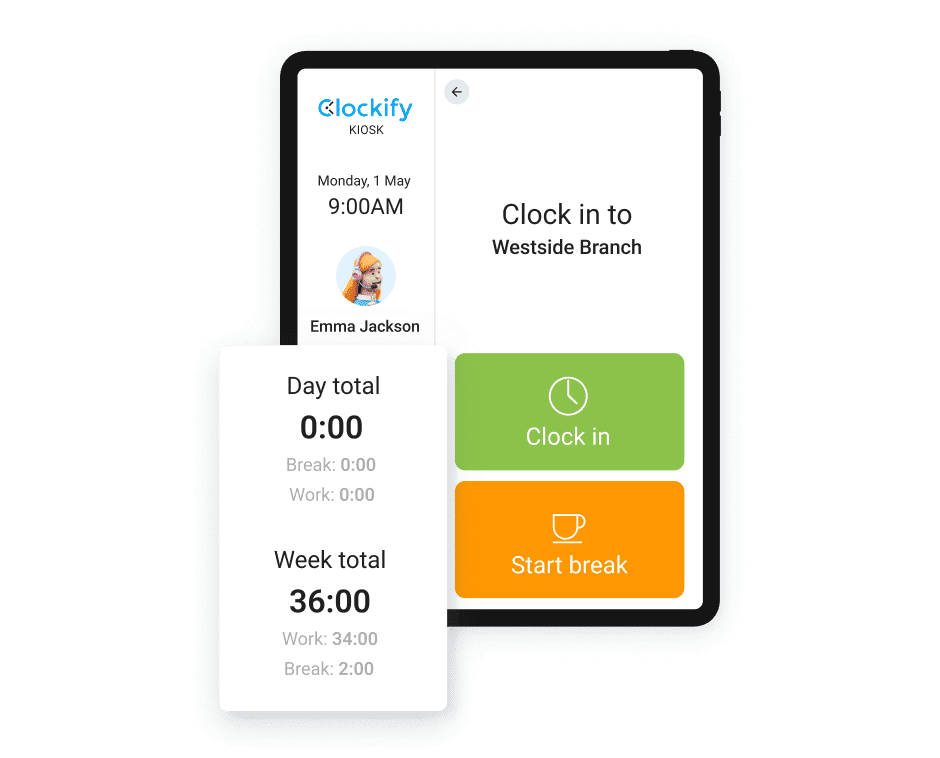
As you can see from the instructions above, the kiosk is incredibly simple to set up and use.
But if you need a kiosk in multiple locations, you’ll notice that upgrading is more affordable than what other time clock apps charge.
Option 2: Timer app
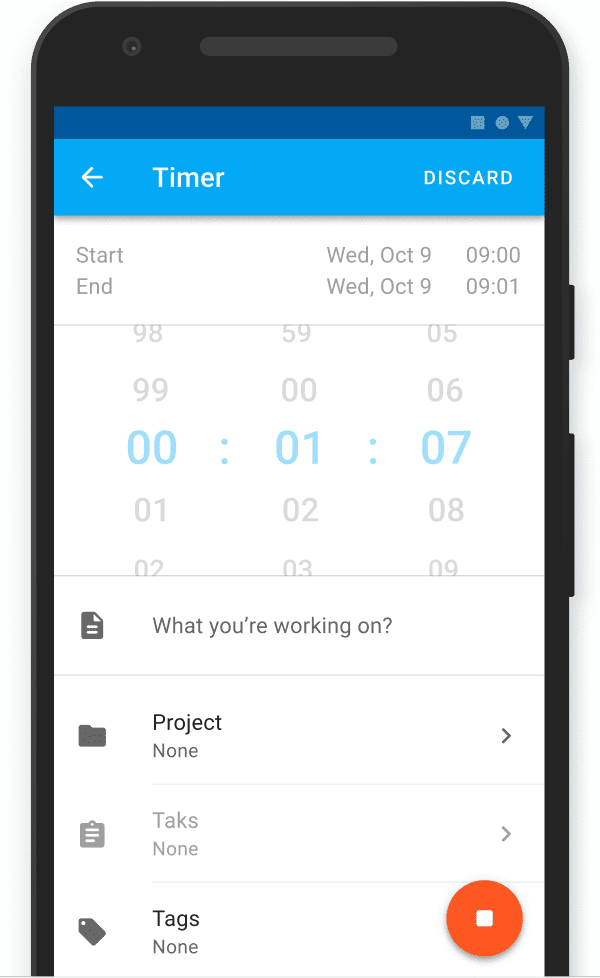
Another quick way to track employee attendance is with the timer app. Here’s how it works:
- Create a free Clockify account, and
- Invite employees by adding their email.
After these 2 steps are complete, the employees should:
- Accept the invite,
- Download a mobile app, and
- Log in and start/stop the timer as they work.
This option is beneficial for people who work onsite.
However, the timer app is also convenient for remote employees. Why? Well, it lets them enter time for as many projects as they wish and on whichever device they prefer.
Option 3: Timesheet
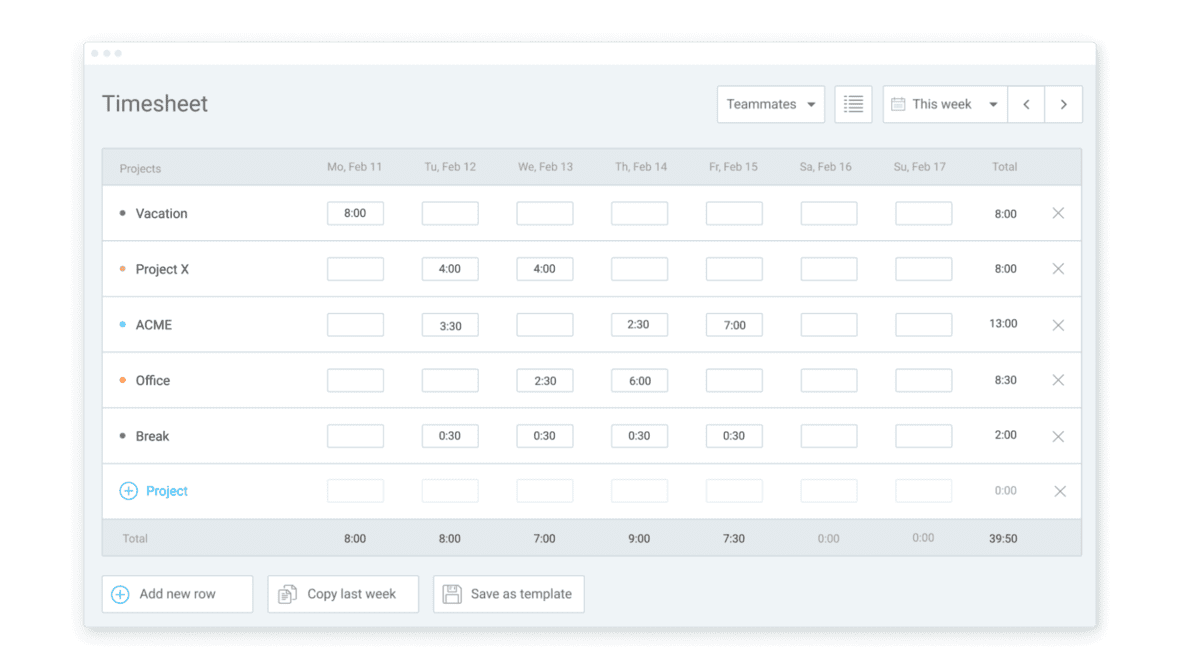
Some teams don’t have to track real-time productivity. For those folks, filling in a digital timesheet at the end of the week or day is best.
Workers can do this in a timesheet app. But first, the manager has to:
- Create a free Clockify account, and
- Invite employees by adding their email.
After that, the employees need to:
- Accept the invite,
- Open the timesheet in a browser, and
- Select what they worked on and enter time under the given day column.
Timesheets are the simplest form to track attendance. Although it’s not as accurate as the timer, the timesheet is the easiest for employees to add to their everyday workflow.
Interestingly, you can set up automatic timesheet reminders if people forget to log their time. And for the icing on the cake, managers can approve timesheets before delivering them to payroll.
Option 4: Auto tracker
An automatic tracker may be a preferred choice for some employees.
To set up your auto tracker, simply do the following:
- Create a free Clockify account, and
- Invite employees by adding their email.
As soon as you’re done with this, the employees should:
- Download and install the desktop app (Windows, Mac, or Linux), and
- Open and enable Auto tracker in the desktop app.
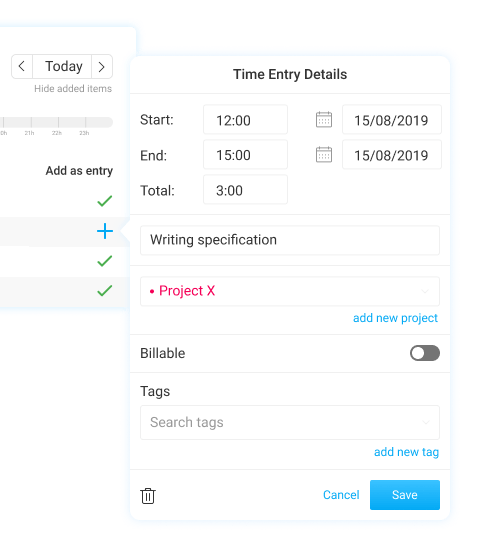
The browser extension and desktop app offer additional features, including:
- Automatic time reminders that inform you when you forget to launch the timer,
- Idle detection that tells you when you fail to stop the timer, and
- Automatic start/stop the timer when you turn your browser/computer on and off.
Clock-in and clock-out reporting with Clockify
Clock-in-and-out reporting is vital to track work hours accurately. In short, a solid clocking reporting system benefits:
- Employees,
- Managers, and
- Clients.
Let’s explore what types of reports Clockify offers.
#1: See real-time activity in the Team Dashboard
The Team Dashboard offers you a glimpse into whatever your coworkers are up to.
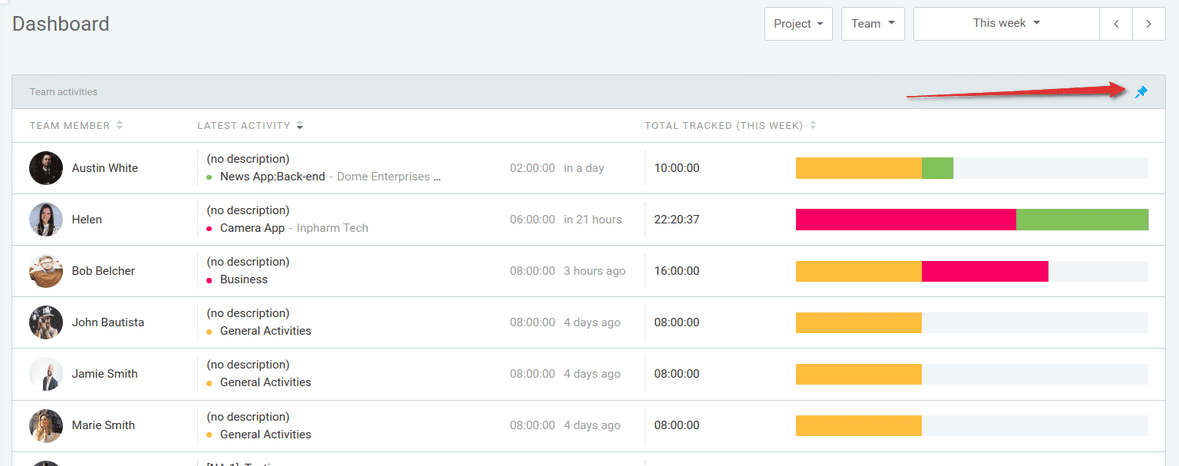
Simply open Team Dashboard in your browser to find out:
- Who’s currently working on what,
- Who tracked the most time, and
- What someone’s last activity was.
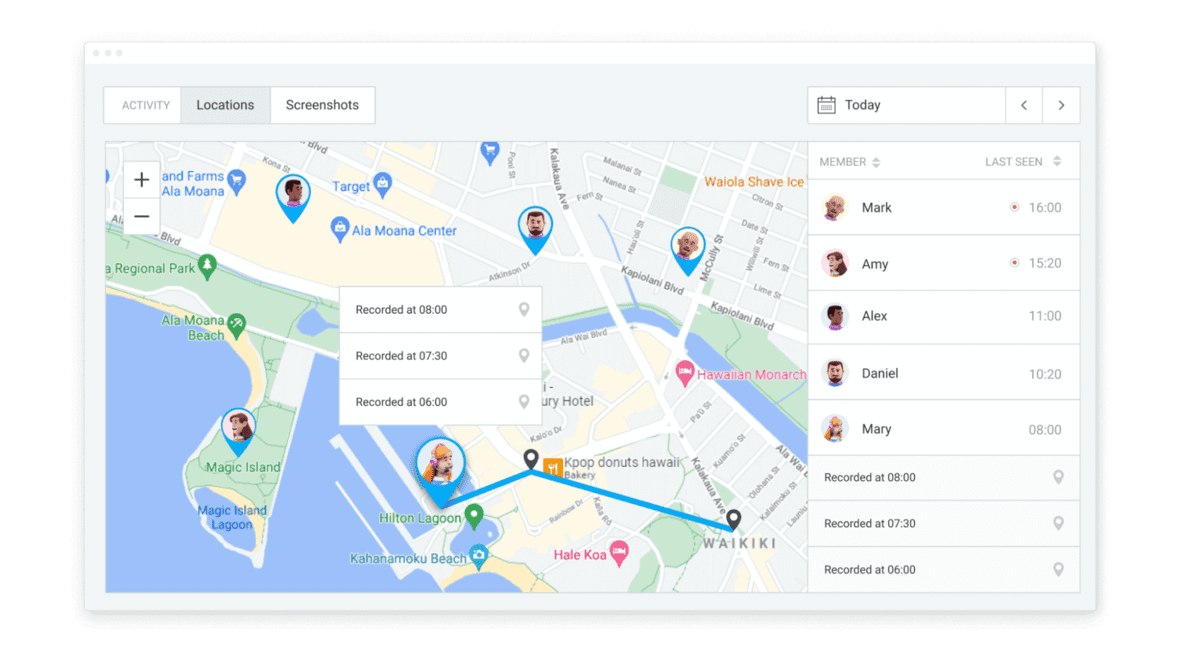
If you enable GPS tracking, you can view locations where people start and end time.
#2: Create an Attendance report to record availability
Attendance reports let you see the daily employee attendance, including:
- When they started and ended their workday,
- How long they were on break,
- How much they worked, and more.
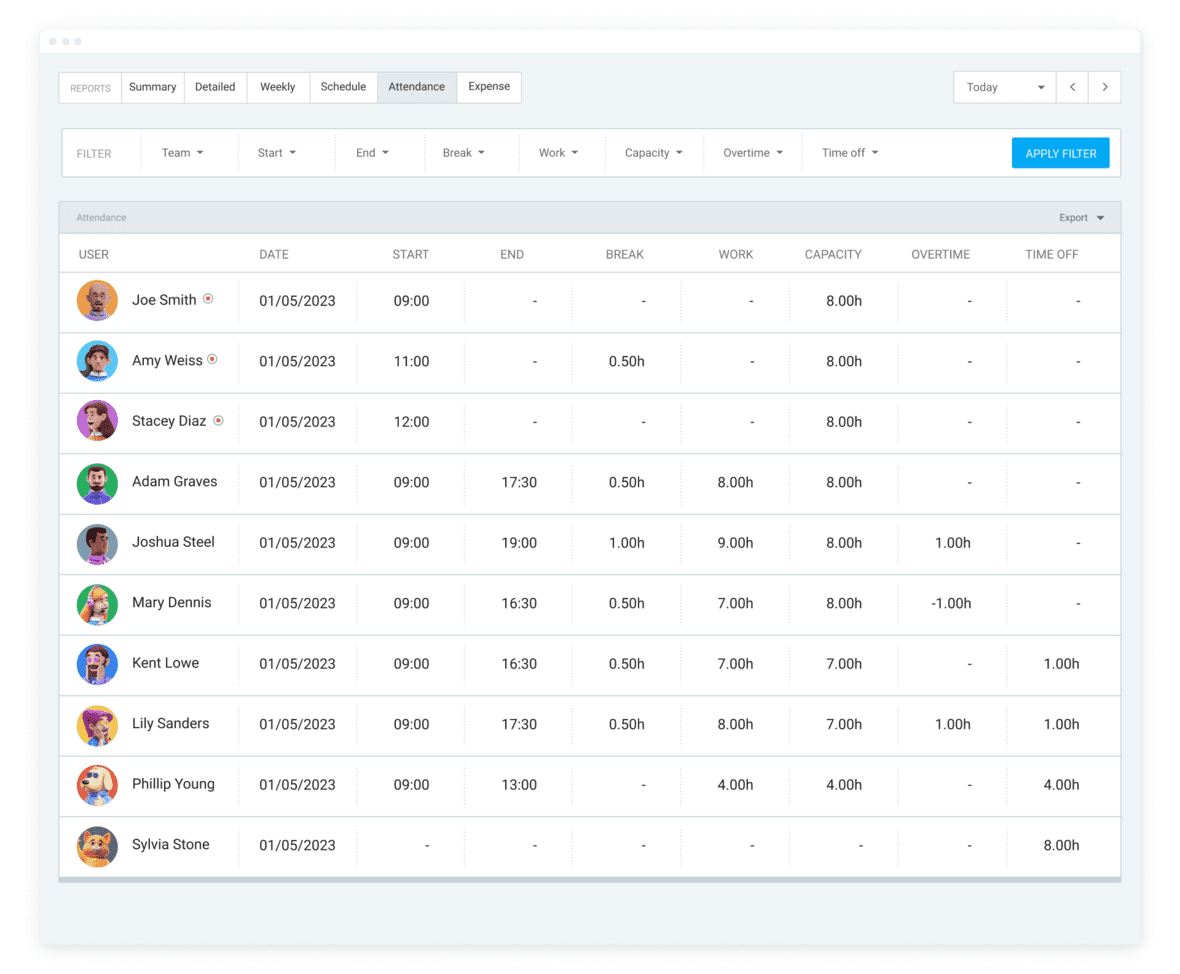
You can also use date ranges and filters to get the answer to questions like: Who had overtime last week — and on which days?
#3: Make a Summary report to look into estimated vs. tracked time
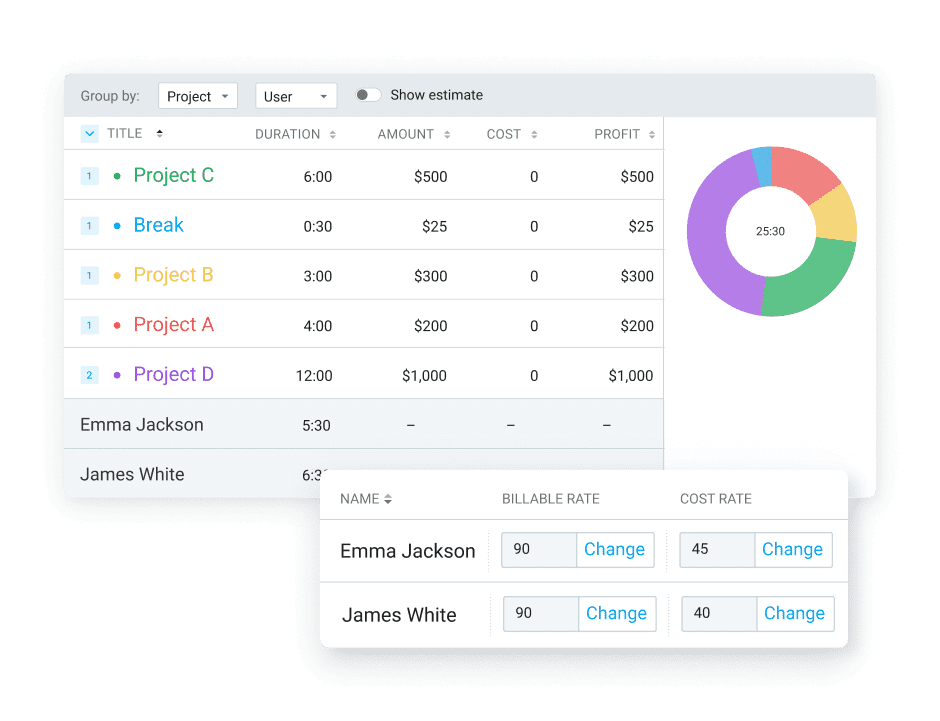
The Summary report allows you to summarize time cards by:
- User,
- Project,
- Location,
- Time period, or
- Any other level you want.
You can even filter summary reports, export them as CSV, PDF, or Excel, and share them with others.
#4: Produce a Detailed report to get all details on performance
The Detailed report allows you to see all time clocks 1 by 1. Apart from that, you’ll see your employees’ start and end times.
In terms of capabilities, admins can:
- Edit people’s time cards,
- Add time for them, and
- Find uncategorized entries.

#5: Create a Weekly report to check who hasn’t logged work hours
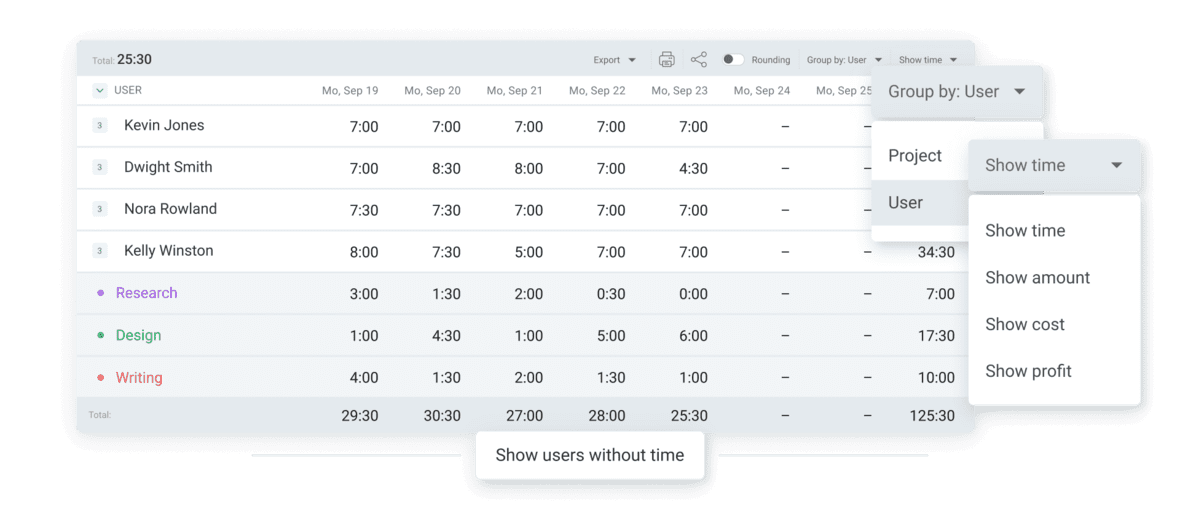
The Weekly report is like a classic timesheet showing all time entries categorized by user and project.
In the Weekly report, admins can sort the data by:
- Time,
- Cost,
- Amount, or
- Profit per user or project.
_____
Further reading
This is just a summary of an article previously published on the Clockify blog. To learn more about how to set up a clock-in clock-out system at work, we recommend reading the full article:

